Okay, so, today I’m gonna walk you through my little project: building a helium balloon inflator. Sounds kinda basic, right? But trust me, there were some unexpected twists and turns.

It all started when my kid decided he wanted a ridiculously large number of helium balloons for his birthday party. Renting an inflator seemed like a rip-off, and buying a disposable helium tank? Even worse for the environment (and my wallet). So, naturally, I thought, “I can build one of these!” Famous last words.
First things first: Sourcing the parts. I figured I’d need a regulator, some tubing, a nozzle, and a way to connect it all to a helium tank. The helium tank itself I decided to rent from a local welding supply shop. They were way cheaper than party supply stores. The regulator was the tricky bit. I initially grabbed a cheap one off of that online marketplace, but it turned out to be a total dud. The pressure gauge was stuck, and it leaked like a sieve. Don’t cheap out on the regulator, folks. Seriously.
So, back to square one. I ended up going to an actual hardware store and getting a decent quality regulator meant for welding gas. More expensive? Yes. Worth it? Absolutely. It had a proper pressure gauge and didn’t leak. Lesson learned.
Next up was the tubing and nozzle. I opted for some flexible PVC tubing because it was easy to work with. For the nozzle, I actually ended up using the nozzle from a broken bicycle pump. It fit perfectly into the end of the tubing and was just the right size to inflate the balloons. Improvise, adapt, overcome, right?
Assembly time. This is where things got a little fiddly. Connecting the regulator to the helium tank was straightforward enough. But getting the tubing securely attached to the regulator and the nozzle took some trial and error. I used some hose clamps to make sure everything was nice and tight. You don’t want a helium leak, trust me. It makes your voice sound funny for a few seconds, but it’s also wasteful.

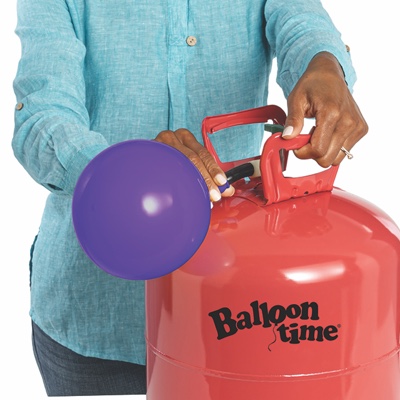
Testing, testing, 1, 2, 3. With everything connected, I cautiously opened the valve on the helium tank. The pressure gauge on the regulator sprang to life, and I carefully adjusted the pressure. At first, nothing happened. Then, with a hiss, helium started flowing through the tubing. Success! I quickly grabbed a balloon and tried inflating it. It worked! But the pressure was a bit too high, and the balloon nearly exploded. Oops.
Fine-tuning. I spent the next hour or so fiddling with the regulator, adjusting the pressure until I found the sweet spot. Too little pressure, and the balloons took forever to inflate. Too much pressure, and they popped. It was a delicate balancing act. I also discovered that the bicycle pump nozzle wasn’t ideal. It was a bit too short, and it was hard to get a good seal on the balloon. I ended up wrapping some electrical tape around it to make it a bit thicker. Not pretty, but it worked.
The big day. Finally, the day of the birthday party arrived. My DIY helium balloon inflator was put to the test. And you know what? It worked like a charm! I inflated dozens of balloons in no time, and the kids were thrilled. Okay, so it wasn’t the prettiest piece of equipment, but it got the job done. And I saved a ton of money in the process. Plus, I got to feel all smug about my DIY skills. Always a bonus.
Final Thoughts
- Don’t cheap out on the regulator. Seriously, it’s not worth the headache.
- Experiment with different nozzles to find one that works best for you.
- Take your time and adjust the pressure carefully. You don’t want to pop all your balloons.
Overall, building a helium balloon inflator was a fun and rewarding project. It wasn’t as simple as I initially thought it would be, but I learned a lot in the process. And more importantly, I made my kid’s birthday party a little bit more special. Now, what should I build next?
